A GREAT EXPERIMENT OR HOW NOT TO MAKE A EMBROIDERED PILLOW
A&S Champs 2023

When I set
out to start this project I have one thought in mind; I need a footstool with a
pillow. While this concept seems easy enough, I quickly learned what does and
does not work

Crossed stitch stitches have changed slightly over the
centuries with the biggest changes in how they are laid to create density on the back of the piece. In the 16th
century they used a “spiral” pattern to lay the stitches which creates an even
layout and protected back. These pieces would have been used for bed hangings,
pillows, and potentially wall hangings. The embroidery was created on canvas
then attached to another material like velvet. Compared to weavings that need a
loom, the ladies of the court could create these pieces on a portable level as
well as individualize the design being created. Printed books and patterns were
becoming more and more popular as well as pre printed fabric, however it was
still not uncommon to have skilled artists hired or living in house for design
purporses
Crossed stitches was a popular form of needlework in the
French court and something Mary Queen of Scots attempted to bring with her to
the Scottish courts as well; this was also an activity she continued to do when
she lived in England. In my research it does not appear to be as popular to be
a task completed by the ladies in the court of England, it still was done as
can be seen in long pillows and other accessories. It appears that it was common among the
countries to have the same basic concept to start the project. The richer
houses would employ others to create a pattern and lay it on the fabric then
the court ladies would complete it.
METHOD

One of my favorite resources is a book I picked up a few years ago called “here be wyverns”. It is full of different patterns in a grid. Grids are used for several different art forms. Historically, a paid artist or woodcut would be used to create the pattern on fabric. For this projected I attempted to draw the whole design by pencil which had several issues; the printed image didn’t completely line up in the space that was needed as well as the pencil kept fading. In several other projects since I have only marked out the major 4 points on the project and marked off on my pattern what I have completed. This has allowed better outlining for me. They also would have used a pouncing technique historically, which involves pricking holes in the paper pattern, and then using a bag of chalk or other material to mark the pattern on the fabric.

I also outlined the pieces first, then filled in the color. Typically it is recommended to start in the center of the project for filling in and work your way out. This helps to prevent spacing and lumpy issues that can occur. I also was attempting to use up any piece of fabric I had and fit many of the design pieces to those. While that was nice to work on smaller pieces, because they were not the same dimensions as the others, it caused issues lining up with the boarder when completing. I should have made sure that all the pieces were the same height at least to prevent this problem.
Once all the pieces were embroidered I washed and blocked them prior to sewing them together. My thought was that if I sewed after washing I would have blocking issues; sadly I was very, very wrong.

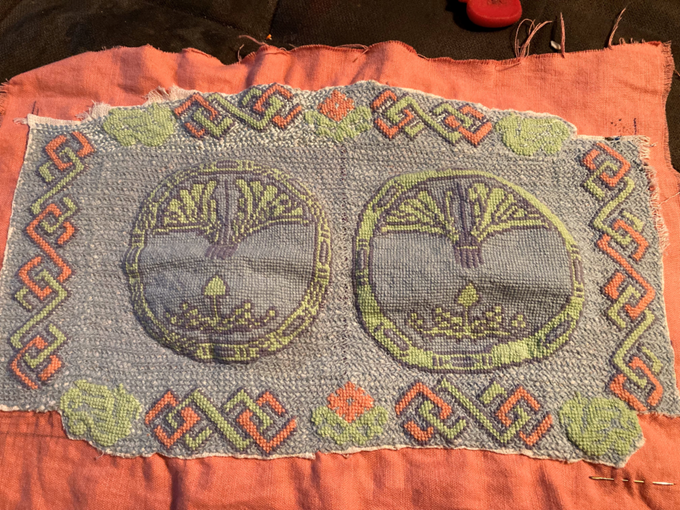
Washing took the stiffness out of the fabric and it was fraying much faster than expected. And because it relaxed I could no longer complete a tent stitch for some reason on the background. Also, because the pattern pieces were different sizes, and I didn’t measure things before, there was large gaps in fabric that I couldn’t really compensate for. I was able to tuck and fold some of it, others I ended up cutting the fabric after sewing it together to get it to lay somewhat nicely. I cannot find documentation on using long arm cross stitch on pillows historically, although I have seen it on samplers. I did use that technique for the background knowing how it lays a nice, even, tight stitch


Figure 5 competed on salmon linen
While it may
not look overly fancy, this was a great way to learn layout and practice
following more advanced patterns. It also allowed me to learn what I need to correct
in my technique. To see how if my theories on why it failed were correct, I
made a second sampler, this time washing after all the pattern was completed. I
did not put the bindings around the edge until after washing, however the
stitches held firm. I recommend to put the binding on before washing to prevent
aggravation and fraying when trying to complete it after.

Figure 6alternative piece created in cross stitch and
basketweave tent stitch
MATERIALS
Historically,
linen, wool or silk would have been used. I typically work in DMC cotton due because
of ease of use as well was the softness of the finished project. While DMC does
have a spin to it, it is very minimal which allows the threads to be separated.
I have attempted to work with different
types of wool and linen thread, but still find it finicky to work with. As a
middle ground I chose to work with spun cotton as a practice on how to deal
with more heavily spun fiber. I eventually ran out of the blue so I switched to
a color close to the original to complete in DMC floss. I am unable to get more
of the blue due to it being a discontinued item. At the end of the 16th century,
beginning of the 17th century
cotton was something that would be mentioned in house records, but is still not
as easily accessible as it must come from other areas of the world than western
Europe.
As for the
ground fabric, I used even-weave cotton canvas. Historically uneven weave
canvas would have been used, but I have not quite gotten the hang of it as well
as discovered the best weight to use for its creation. I have not found much
detail about it other than “uneven weave canvas” being mentioned.
BIBLIOGRAPHY
·
Embroidery Pattern Books 1523 - 1700
- Victoria and Albert Museum (vam.ac.uk)
·
Exploring
Elizabethan embroidery by Dorothy Clarke
·
Here
by wyverns by nancy spies
·
“project
404” by me
·
Elizabeth
I and her world by Susan Watkns


Figure 71535 woodcut pattern


Comments
Post a Comment